Thursday, January 30, 2014

Garage Addition Update - Paint and Flooring


Breezeway/mud room area.
Right side: Seeding counter under the window, and
we moved the main floor laundry to the walled
off space behind.
Left side, from front: Half bath, utility storage (hot water
heater), and additional pantry storage


Did you imagine that the little family has been tucked up in their special space for awhile now?  Nope.  But there is substantial progress inside, and a light at the end of the tunnel.  Just how long is that tunnel?  That's always the question.  Hopefully, not too long now.


Garage exit, stairway, and "Mini Split"
heating unit


Princess Sassy and I decided on the set of paint colors: walls, millwork, and cabinets.  We LOVE the wall color, Sherwin Williams Mindful Gray.  Just in the center of taupe and gray.

We had SW Nuance chosen for the trim, and SW Gray Matters picked out for the cabinets.  The island will be a somewhat bright, deep color for fun and contrast (keeping that to myself for now).  But I went upstairs today to double-check the color swatches with the wall color in natural lighting, and I'm second-guessing both the trim and the cabinet colors.  The trim looks like it might be too dreary, and maybe a touch green, which I sure don't want.  The cabinets might be too dark, forcing the island darker or much brighter than we want to get the desired contrast.


So anyway, the walls and ceilings are painted, and as of this week, the vinyl flooring is in upstairs and in the breezeway. 


Bathroom.  Princess Sassy wanted to change up the paint
in here for a little more freshness and fun
 We chose a medium shade of wood-look vinyl for the kitchenette area, bathroom, and hallways in the upper level, and a gray, tile look vinyl for the breezeway.  They look great.


The princess and I thought the carpet would go in immediately after the vinyl, and we could start moving things in.  Boy, we were wrong.  


Kitchen area with shallow pantry on the right, opening to the hall


 - Before the carpet, we need baseboard, which needs to be carefully installed, then have the nail holes filled, sanded, and the woodwork painted in place.

 - Before that, the interior doors need to be hung and cased.

 - Before THAT, the interior doors need to be painted.

Full circle... we're back to me, and the trim color choice!


Meanwhile, back at the ranch...


We're having some dishwasher leaking trouble again... times 2!  The one on the right has been sitting out like that since December, and the left one joined it last week.  Aargh!!!

More on that, and getting to that light at the end of the garage addition tunnel, as things develop.


Tuesday, January 28, 2014

Pizza: One Step Back

Prince CuddleBunny was sick on New Year's Day and a few days preceding.  He had a sore throat, cough, headache, and fever.  No upset tummy, but no appetite, either.  So I was happy when he was finally hungry, and wanted to make him whatever sounded good...

Pizza.

I had dough made, of course, since I always replenish my dough bucket the same night I use any.  But he was hungry "NOW," and with heating the oven and heavy stone, pizza is not really a "now" meal.

So I thought a bit, and decided to go back a ways, to before I'd ever heard of pizza stones, and use a cookie sheet at 425 degrees, like my mom did when I was a kid.    The oven was preheated by the time I spread the dough and topped it, so no extra waiting, like with the stone, which takes about an hour to heat.


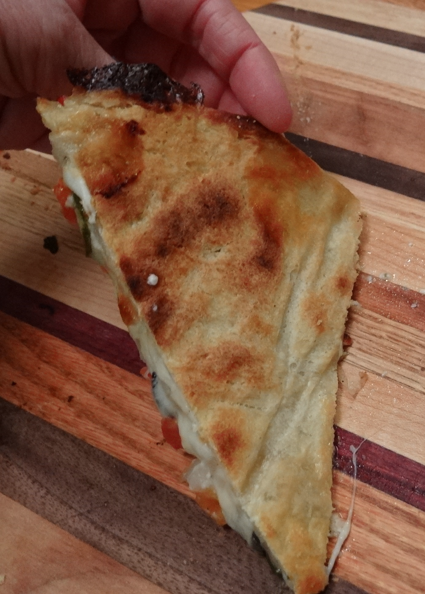
Last Friday's version of the cookie-sheet pizza:
round and on parchment, so I could make our usual 5 pies.
I slid these onto the hot cookie sheet, using the pizza peel.

I had one of the blue pan-racks already in the oven cavity, so that's what I used as a rack, in the bottom position, and just put the cookie sheet on that.  I used the Bake mode, so it only heated from the bottom.  After all, that's the only option we had when I was a kid!


The pizza came out great in about under 20 minutes.  The top was nicely browned and the crust was crispy and brown, too!  A result I've been fighting and fighting to achieve on the expensive integrated Gaggenau pizza stone.  I'm happy to have found this method, but still frustrated that something made especially to do this job, and was so expensive, just doesn't come through.
This one, I put directly on the blue pan, without the
cookie sheet in between.  The crust got a little too dark.
--But still preferable to too pale and limp.


A couple of Kitchen forum friends have suggested trying a Baking Steel. Sur la Table offers one (14" x 13") that's available on Amazon, which is made in USA by Stoughton Steel, the same as the original Baking Steel (14" x 16") offered here.  The basic model is a 1/4 inch thick piece of steel, used similarly to, but instead of a stone, and from reading the reviews (here... and here), sounds amazing.  I have a decent result with the cookie sheet, but it sounds like the baking steel will allow me to go back to the high heat, quick-turnaround, great-every-time type of pizza baking I'd gotten used to in my Wolf oven.  It will just barely fit in my silly, shallow oven, and at almost $80, the price tag is slowing me down a bit.  But I think that, eventually, --and probably sooner rather than later, because I'm impatient-- I'll have to give it a try.


Did you notice the cutting board in the last couple of pics?  That's my beautiful Christmas gift from Prince CuddleBunny.  He enlisted his dad's help and made me this beautiful pizza board... 14" in diameter by 2" thick.  I love it!!


Monday, January 27, 2014

That's an Easy Meatball!

I'd always been afraid of making meatballs.  Maybe not afraid, like a meatball phobia, but that it seemed like way too much work.  I envisioned forming individual balls by hand, and, painstakingly, turning them over and over in a greasy skillet to try to get the spheres evenly browned all the way 'round.

I expressed that to my Bible study friend, Ch, who said she had a much easier recipe and method for me to try. (Ch was the one who also gave me the wonderful Apple Butter recipe I shared in October.)

These are great, and so simple and fast to make.  No more meatball fear for me.


Ch's Easy Peasy Meatballs 
(my name for them)

Preheat oven to 425.  Spray rimmed baking sheets with Pam or equivalent.


Place in large bowl:

1 lb ground beef
1 lb ground pork or Italian or other seasoned, bulk sausage
1 egg
1 cup bread crumbs (Ch suggested fresh or Panko.  I use rolled oats/oatmeal)
1 clove garlic, minced (I use garlic powder, 1 tsp)
1 tsp pepper
1 chopped onion or 1 Tbsp dried minced onion
Mix together (hands work best), but don't handle it too much.
  
Note #1: I watched a TV show called "My Family Recipe Rocks" on which a woman was aghast watching the host, Joey Fatone (formerly of 'N Sync fame), "Bologna ball" the meatballs he was forming for her.  She had told him not to handle them too much and form the balls loosely and quickly.  Instead, he was rolling them around in his hands as he talked, clearly overworking them.  I found out what she meant a couple weeks later, when I decided to mix spices and cheese into some hamburger by putting it in a ZipLoc bag and squishing it around.  "Bologna balling" results in a dense, strangely textured meat, similar in appearance to processed meats, like bologna, that cooks up pretty dry.

To prevent "Bologna balling" in the forming stage for this recipe, I used our cookie dough scoop, as suggested by Ch.  This makes meatballs about 1 1/2" in diameter.


Place them on the baking sheets so that there is 1/2 to 3/4 of an inch in between.  (You don't need to space them like cookies, like I did the first time, since, duh, they don't spread.)  Bake for 12 to 15 minutes, until cooked through. (Internal temperature about 165 to 170 degrees)


Drain and cool on paper towels and/or cooling racks.  Unless you're eating them right away, of course!


The 6 + 6 pound batch I stirred in front
of the football game.
Of course, in our house, I do not mess around making meatballs with only 1 or 2 pounds of meat!  ;-)  The last time I made these I sextupled the recipe, using 6+ pounds each of ground beef and Italian sausage.  It was a huge amount to stir, so I might stick to 4 to 5 pounds of each, as I did the first time I tried, which worked more easily.

Note #2:  It is important, as I was taught in a class in college about the science of foods, not to multiply the spices at the same rate as you do the rest of the ingredients.  Our professor advised to use only 1 1/2 times the spices when doubling a recipe.  So for 4 times the amount of meat, for example, I'd used only about 3 times the amount of each spice.  This can be varied to your taste on each spice.

6 pounds each of the 2 meats made hundreds of meatballs... at least 550.  

I placed 45 to 50 each in gallon-size ZipLoc bags and spread them flat in the freezer.  They are so easy to grab, a bag at a time or a few at a time, to warm up for a quick spaghetti and meatballs dinner, or a quick meal or snack for a family constantly on the go.  


The biggest problem I have with this recipe is that the kids pick them out of the spaghetti, then no one wants the leftover noodles and sauce!  


Since that's now happened twice, I asked if I should just serve meatballs and sauce from now on.  Prince Inventive said he wants "meatballs, sauce, and about 2 spaghetti noodles, just so we can say we're having 'spaghetti and meatballs.'"


Friday, January 24, 2014

Recipe Tab


Introducing... the "Recipes" page, accessible by a tab at the top of the blog.                                                                      


I will, of course, be adding more recipes to the list as I post new ones.


Chicken Slop, Crockpot Style

3 years ago, I wrote about a weekly dinner staple here at RHome410 (Our Home for Ten), Mexican Chicken Slop... We have Prince Stoic to thank for the dish's lovely title.  :-)

It's fairly easy to make, but not as easy as this latest recipe, a variation of something I found posted on Facebook.  

I have never had much luck with crockpot recipes (dry meat, bland taste, lots of hassle), so use mine mostly as a warmer for the Hot Shrimp Dip we love.  (Recipe here)

But now our crockpot has new life, doing what it was intended... Making dinner slowly, all day, allowing me the freedom to accomplish other things, relieved in the knowledge that there will be no last minute panic about what to serve for dinner.  It's quite helpful on the nights when I'm off with Prince Go-for-It at baseball practice and the family comes home to an empty house, but happy to find a hot dinner, ready and waiting.


Crockpot Chicken Slop

Place into the crockpot:

2 1/2 to 3 pounds frozen chicken tenders (or breasts, sliced in 3 pieces, lengthwise)...Yes, FROZEN!
8 oz cream cheese
1 1/2 cups prepared salsa + 1/2 cup water (or 1 can Rotel seasoned tomatoes, undrained)
1 can black beans, drained and rinsed
1 can whole kernel corn, drained


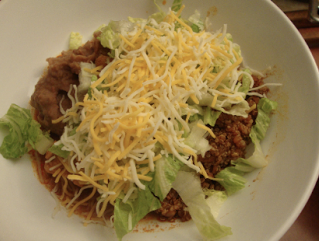
Nope...This is not a photo of the Crockpot Chicken Slop,
or, even, the Shrimp Dip.  But it is a glimpse
of a post to come (in front of the TV
 showing our SuperBowl-bound Seahawks--YAY!).
It's one of my favorite "quick-and-easy,
fill-the-freezer, then-fix-fast-dinners" solutions yet.


Cook for 6 to 8 hours in the crockpot.  

About 45 minutes before serving, prepare rice or quinoa, according to package directions, optionally cooking it in chicken broth instead of water.   -This can also be cooked ahead of time, and reheated for dinner. 

Immediately before serving, use 2 forks to shred chicken pieces before spooning the chicken and its sauce over the rice or quinoa.  May be served with your choice of accompaniments, such as thinly sliced lettuce, shredded cheese, black olives, refried beans, sour cream, and/or additional salsa.


Pictures of food will have to wait, while I can
spend my time doing things like this!


Monday, January 13, 2014

Bored to Burger


Princess Eager was bored, and had the urge to bake a cake.  


I had no idea that she had a big creative urge, too!  This was the result.


Not only cool looking on the outside, moist and wonderful cake to eat, too.

One of those things I really wish I could show my mom!  She would've loved it.


Related Posts Plugin for WordPress, Blogger...