Friday, December 31, 2010

Thank-you Note Week

We aren't officially homeschooling right now, but the kids do have a writing assignment for the week...Writing thank yous for the Christmas gifts given by grandparents, and aunts and uncles.  The style of the thank you depends on the age and ability...Younger ones might draw a picture and copy "Thank you," then sign their names.  Older ones are expected to write a couple paragraphs telling how they'll use the gift or what is particularly special about it, and then add a little more about how nice it was to visit, share something else about their lives, or ask about goings-on in the recipient's life.
              
When my siblings and I were kids, we were expected to write thank you notes to anyone from whom we'd received a gift by mail or other means....A case in which the giver was not there in person to receive a verbal expression of appreciation.  In fact, we were required to write the note before using the gift.  That ensured we got to the task promptly, and I remember writing notes on quiet Christmas afternoons.
                   
I haven't made our kids stick to that rule, but just make sure the notes are written within a few days.  --And, we write even if the people/person had been present for a quick thanks at the time.  I've seen during my life how my parents feel about receiving a thank you -or not receiving one- so I think it's nice to take the extra step, going into a little more detail and thought in writing.  In this world today, too many polite social gestures are being forgotten, so I hope our children will always recognize the care and effort people put forth by taking their own time to show appreciation...and I hope I receive thank-you notes from my grandchildren, too.  No one was ever hurt by being thanked too much or too nicely!  And it's always a day brightener to get something positive and personal in the 'real' mail.

Thursday, December 30, 2010

So Excited! A New Soup/Stew/Stock Pot is on it's way!

My kids divided ranks, then shared resources to get me 2 very nice gifts for Christmas.  A  comfy Lululemon jacket that I now live in, and a gorgeous wool coat that, unfortunately, didn't fit quite right.  After finding no replacement, I asked if I could use the funds for something else. They said they'd be happy as long as I have something I really want.  I've been dreaming of a larger pot for a few years, especially every time I make soups, stews, etc.  It's even been a couple of years since I started all my research and price comparisons....so I can finally take the leap.
           
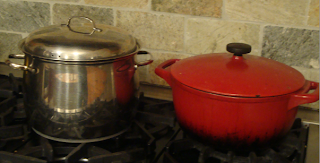
I have an 8-quart Belgique Stainless Dutch Oven that had been my 'go-to' large pot for several years, and it served me well as our family grew.  But on my gas range, I'd had trouble with these stainless pans with the thicker disks on the bottom...The flames coming up around the thinner sides meant trouble for sauces and soups.  With my electric ranges I'd never cooked anything that was OK on the bottom but burned on the sides!  So I knew I wanted something that was as heavy on the sides as the bottom. 
          
I also have a 6 1/2 quart Tramontina porcelain-enameled cast iron pot .  It's a fun red and does a great job on the gas burners, but because our batches of soups and stews are getting bigger every year as the kids and their appetites grow, I need something with a larger capacity than either of these two old favorites.
        
Le Creuset Enameled Cast-Iron 13-1/4-Quart Round French Oven, DijonThe first large pot I fell in love with was a 13 1/4 quart LeCreuset enameled cast-iron French Oven.  Definitely a beauty, but around $400 and, as was pointed out by a helpful friend, those are quite heavy empty (25 pounds), and maybe nearly impossible to move when full!    This same friend recommended I look into tri-ply cookware. 
Tri-ply construction consists of a layer of stainless inside the pan with an aluminum core for good heat conduction, and either aluminum or stainless on the outside...All the same thickness for even heat, so I wouldn't have the burning sides.  All-Clad seemed to be the most highly regarded brand, and I am convinced from their specs this would be a great choice, but their 12-quart is close to the $400 neighborhood also.  Other brands make tri-ply for the home market for lower prices, but not in 12 quart or larger sizes.  I then turned to the commercial/restaurant supply stores.

That's when I found it.  A Vollrath Tribute, 3-ply, 12-quart stock pot with construction specs that appear to be exactly what I need, and my chef-friend reviewed them and agreed.  Different sites had them available, but Katom.com had the best price: $87.90 for the pot and another $27 or so for the lid.   (Their prices and selection were the reasons I searched them out as an advertiser to display on my blog page... They seem a good resource for serious home cooks.) Much better than $400, but $115 was still not an amount I have rattling around free or extra in my budget, which is why it's taken me so long to order it.  But with my Christmas coat money, today is the day.  I will let you know how it works out for me when it arrives....Already a new kitchen tool for 2011!


UPDATE: The 12-quart stockpot was back-ordered for 10 - 14 days.  I had a difficult time deciding between it and the Vollrath Tribute 16-quart Stockpot anyway, so that, and Hubby's opinion that the 16 would be better for us, prompted me to switch the order and go big!  It is shipping today. (Expected delivery: January 7.)  :-D  By the way, Katom.com customer service (via Live Chat) was very helpful and personable.
Vollrath Tribute specs

Wednesday, December 29, 2010

2010: New Tools in my Kitchen

Dough cutter/Pastry scraper and Escali Scale helping me with bread baking

 A few new gadgets made my cooking and baking tasks easier and more pleasant this year (because most of the following are images/links from commercial sites, this is when you may have to turn off any Ad-blocker you have to see the photos.  I hope that's not a problem for anyone.):

Oxo 73281 OXO Good Grips Pastry ScraperOxo Good Grips Dough Cutter/Pastry Scraper  Hubby always saw the cooks using these on his television cooking shows.  I'd never had one and didn't miss it, but he became convinced I needed one.  I'm glad he did!  It's one of my favorite little devices, even though it still seems silly, as a spatula could accomplish the same things...Just not as nicely.  It cuts through a big blob of dough easily and cleanly, and makes cleaning up the island a breeze.

Progressive #LGK-3620 Stainless Steel Bash, Chop, and Scoop CutterBash, Chop, and Scoop Cutter  I have this because the kids put the Oxo pastry scraper away in the wrong place, and for weeks I couldn't find it ANYwhere!  Hubby wasn't aware that I finally discovered it in the back of a drawer I'd searched several times, so he bought me this as a replacement for Christmas.  On a heavy baking day, when the pastry scraper was in the dishwasher, I broke this out of its packaging and gave it a try.  It's not meant to cut dough and scrape counters, I guess.  With the handle set on the top as it is, it's not balanced for doing those other tasks.  I have to give this one some more time, and discover what it's really for!

Zyliss Susi 2 Garlic PressZyliss Susi 2 Garlic Press  I had an ancient garlic press that used to belong to my mom or grandmother.  I had to peel and trim each clove and put in one at a time.  It mashed the garlic and left most of it inside the press.  It was more efficient to mince the garlic with a knife.  I found myself turning to garlic powder when I felt too hurried or lazy to mess with peeling and mincing.  But we love to put fresh garlic on our pizzas as soon as they come out of the oven, and minced garlic was often too big, so I finally decided to 'spoil myself' and buy a new press.  I did some ridiculously extensive research (like always) and decided on this one.  It will handle 2 or 3 cloves at a time, and we don't have to peel them first.  In fact, if we don't, it's easier to clean out after pressing, as it all seems to peel out in one piece.  It does a great job getting the most out of every clove and into the food instead of down the drain or into the compost.
Amco Enameled Aluminum Lemon SqueezerAmco Enameled Aluminum Lime Squeezer, Light GreenAmco Enameled Lime Squeezer and Amco Enameled Lemon Squeezer  These have a story similar to the garlic press.  I love lime juice in things like salsa, marinades, and cold beverages. I kept buying appealing bags of little limes at Costco, but some of them would go bad before I could use them, because it was so much trouble with so little result when squeezing by hand.  I'd seen so many tv cooks so quickly squeeze a lot of juice out of lemons and limes using tools like this, so it was time for another little splurge.  I ordered the lime squeezer first, and we liked it so much, I ordered the lemon one so we could have fresh lemon juice for the lemonade the kids love to make, and for fish and chicken dishes.


Bamix Immersion Blender About 20 years ago, I was given a Braun Hand Blender.  It was great.  I pureed soups, blended beans into refried beans, made baby foods, etc.  It died after years of use, which was disappointing, because I used it a lot.  But as you may have figured out, buying myself kitchen tools wasn't a habit I've had, so I learned to get along without.  I used my hand mixer, a potato masher, or whatever 2nd-best suited the situation.  But my sister always remembered me wishing for another, so she bought me a Cuisinart Smart Stick Immersion Blender for Christmas a couple of years ago.  I quickly adapted to having an immersion blender in my tool set again, and was off and running...Until it hit a tiny, stray ham bone in my split pea soup.  After that, the gears slipped and the motor ran, but the blade wouldn't turn.  So, using my usual investigative approach, I began to read about immersion blenders, and  became convinced that if I spent $129 for a Bamix, instead of $30 for another Cuisinart, I'd never have to buy another stick blender in my lifetime.  I sort of decided to miss the point that most of the glowing reviews were about the $179 Bamix, rather than the $129...but I was already past the 'reasonable limit' on the cost issue, and it was "a Bamix," which was supposed to be THE BEST.  
                         
It does an OK job, but I think it takes longer to blend up a pot of beans than either of the cheaper ones I'd had previously.  It has a few different blades for different tasks, but I seem to use only the one, which occasionally falls off into my soup if I don't get it set in just right.  To give it a full and fair review, I should learn to utilize the appliance for some of the other tasks it can do.  I think that if I'd gone for the more expensive, Bamix Professional, I would've been happier with the longer driveshaft and beefier motor for the big batches of soup and beans I ask it to deal with.


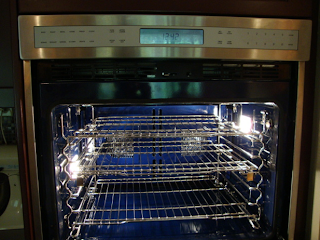
Wolf E-Series Double Oven  Not exactly a 'gadget,' but definitely a welcome new tool.  I've mentioned my new oven a few times in other blog posts.  I loved my Fisher and Paykel oven until the porcelain failed, and started to pit and chip.  I loved the way my 2nd Fisher and Paykel baked, but didn't love the problems I had with the buttons and that its porcelain began to fail, also.  I loved the look of the Monogram that replaced F&P #2, and also loved some of the features, like double timers and full-extension racks that stayed in during self-clean.  But for the important stuff...the actual baking, where reaching and maintaining a temperature are vital, and when reverting to preheat mode is NOT desirable, I was not at all happy.  
      
So far the Wolf is scoring well in all areas.  I love how it looks....I am a fan of knobs, but the matte white touch pad stays much neater looking than the black glass ones on other brands.  The glide racks are wonderful, and the porcelain is holding as it should.  I can adjust to just the temperature I want, and mostly, it bakes just as I think it should.


Cuisipro 16" Locking Tongs ModelCuisipro 16" Locking Tongs  Another gift from Hubby.  Particularly great for using at the barbecue, but also nice at the gas rangetop for staying out of the way of heat from the flames and splatters from grease.  I use these a lot when searing meats, so I get a good grip, but don't puncture through the surface and lose juices.  The only negative?  I keep holding it about 2/3 up the tongs, with the heel of my hand touching the back half...just in the right place to get pinched by the hinge.  Youch.  But, I can't blame the tongs for user error.


Escali Food Scale I talked about this in its own awkwardly titled post, "Who buys something and totally forgets to use it? (Kitchen Scale)"  When I made the Christmas fruit bread it was particularly helpful in determining consistently sized loaves.  This meant I was able to use the probe in one of the 3 the loaves in the top oven and know that the ones in the bottom oven, where there is no probe, would finish baking in the same amount of time.   I still believe I'll find this tool to be of even more help when I ever get around to trying sourdough and more artisan breads....Hopefully, soon.

Tuesday, December 28, 2010

2010: New Cooking Techniques and Dishes I've Added to my Repertoire

This is an odd grouping, with types of food and techniques combined.  But the new foods are a result of a different technique used on an old favorite, so they are included here.  I know that none of these are new in the world of cooking, but they are things I hadn't tried until recently.

Combo of dry and moist heat for Chicken Breasts:  I had tried searing, baking, broiling, poaching, but never really like boneless chicken breast, because it seemed so difficult to keep moist...Until I saw this technique demonstrated on an America's Test Kitchen or a Cook's Country tv show.  
I heat a small amount of oil in a skillet on a medium-high heat, then add the boneless, skinless chicken breast pieces, which have been patted dry with paper towel and seasoned with salt and pepper.  The breasts are left alone for a few minutes to sear.  If they're sticking to the pan, they're not ready to turn.  

When they are nicely browned and easy to lift from the pan, they are turned, and I add 1/2 cup of water or chicken stock.  Then cover the pan and cook for 10 - 15 minutes, until the internal temperature of the breast is 165 degrees.

Flat bread:  For this I was inspired by Steven Raichlen on the Barbecue-U cooking show, which Hubby loves.  I used my Pizza Crust Recipe and divided it into several pieces, forming each into approx 2 1/2 inch balls, then rolling to just under 1/4" thick.  (If the dough fights back, let the balls rest for 10 minutes or so before rolling.)  I transferred the rolled flatbreads onto a greased or wax paper covered cookie sheet to take them out to the outdoor gas grill.  With the barbecue preheated to 400 - 450 degrees, we put the flatbreads directly on the grill, keeping the heat underneath low, or using an indirect method to keep them from burning.  When each got good and bubbly, we turned them just to brown the other side.  I continued to roll dough as Hubby grilled, because I found that if I did all the dough first, and some were allowed to rise too much before grilling, they became too soft and very difficult to handle.  We love eating them with strips of grilled chicken and/or veggies, and condiments like hummus, pesto, tzatziki, or some just liked mayo and fixing them like any other sandwich.
                
I tried these on the rangetop while the electricity was out, and got a much less satisfactory result.  They didn't get as bubbly and burned...I think this method lacked the surrounding heat, and had the problem of the heat source being too close.
                        
Another time I tried baking them on the pizza stone at about 450 degrees, and got nicely puffed pitas.

Barbecue-grilled Pizza:  We had about one week of temperatures around 100 this summer, when heating the ovens for our customary Friday Pizza Night didn't seem like a good idea.  We decided to try baking pizzas on the gas barbecue grill.  I placed the stone on the rack and heated the barbecue to 500.  It was a fun adventure and the pizzas had a more smokey taste.  Some of the family liked it better or as well, others didn't like the difference at all.  For me there was a lot of running back and forth, as I have no counter outside.  It was also HOT for the cook to tend pizzas over the grill instead of sliding them into the oven and keep an eye on them from a distance through the glass.  My overall assessment:  This makes a decent pizza if using the oven is impossible or inadvisable.  I wouldn't go to the extra effort required if using the oven was a reasonable option.

Shish Kabobs: I am now noticing a trend with this post...A lot of new things we tried this year were on the barbecue grill!  For Father's Day we wanted to try something fun, and with meat-loving Hubby and our vegetarian Princess Bossy, we wanted something we could all enjoy.  Shish kabobs not only provided a way to meet everyone's wishes, but made for a fun family project as we cut and loaded a variety of foods onto the wooden kabob skewers, which we'd soaked in water for 20 minutes first.  (Steel skewers work, too, but they get hot and cook things from the inside.  This is good for meats, but can make fruits and veggies cook so fast that they loosen and fall off.) This is a great way to include colorful fruits and vegetables in a way the kids find fun and interesting to eat.  We used combos with chunks of shrimp, beef, chicken, tomato, bell pepper, sweet onion, mushrooms, and pineapple.  Grape tomatoes were not the right choice, since with their small size, they cooked through too quickly, getting shriveled and too soft, sometimes to the point of falling off.


Stock/broth:  I always bought chicken broth at the store.  But I started to use more and more of it as I preferred it to water for cooking rice, quinoa, etc.  During a month I was feeling particularly short on grocery funds, I realized I was finding it on my shopping list all too often, so decided to try making my own.  I bought 2 whole chickens at Costco, roasted them, and after we enjoyed the chicken dinner, I saved the carcass, skin, and all bones for the stock.  I added sage, salt, and pepper, a few bay leaves, a quartered onion or two, and chunks of aging veggies I had in the fridge, which were carrots and cabbage.  I also cut just the tops off the cloves on a head of garlic and dropped in the whole thing. I added enough water to cover all and brought to a boil.  I turned it to low and kept it cooking for several hours, adding water as needed to keep the contents covered.  
                  
I took out the garlic head and squeezed out the softened cloves to use as a spread, then strained the rest of the broth (3 - 4 quarts).  I sprayed muffin tins and small Tupperware type containers with Pam and filled them for freezing.  After they were solid, I popped out the 'stock-sicles' and put them in ZipLoc bags to store in the freezer.  The broth was so much richer and more flavorful than the canned kind...I was hooked. And it's another thing that makes me feel like an old-fashioned 'Suzy Homemaker,' going a bit of an extra mile to make something wonderful to feed my family.


Home-rolled Oatmeal and Home-milled Cracked Grains, and Granola:  I have covered these in prior posts (linked below), but all are new this year, so worth the mention here.  I love doing all of these for my family.  The tasty and healthier results are worth any of the effort.  Definitely things I'll continue to do.
Rolling Oatmeal
My Other By-Hand Milling
...Cracking grains
Granola Recipe
(using the rolled oats)


Monday, December 27, 2010

2010: New Foods/Ingredients I Tried this Year

I think I've grown more in the kitchen this year than any other.  That growth included trying new foods I've never had or used before:
             
Image from www.sustainablesushi.net
Portobello/Portabella Mushrooms:  These large mushrooms have intrigued me for awhile, but the price ($6 or $7 per pound) always dissuaded me.  I'd heard they made for a meaty-tasting substitute instead of a hamburger patty to make a burger, which I thought might be healthy for Hubby, and yummy for me, a mushroom fan. When finding them on sale, I decided to try a grilling portobellos on the outdoor gas barbecue grill.  However, at that first attempt, I blackened them and the family wasn't impressed.  Princess Bossy recommended an oven recipe she'd used several times from Veganomicon: The Ultimate Vegan Cookbook, so I tried again with a much better and more popular result.  After that I added them to stir-fries, pizzas, and pumpkin soup.  Baby portobellos (also called or related to the Crimini mushrooms) worked as well for those dishes that called for sliced or chopped mushrooms.  They seem more tasty than the white mushrooms I was used to using.
              
Balsamic Vinegar:  I first bought Balsamic to make the marinade for the portobellos.  I liked the new flavor so much that I'm inclined to grab it first for other marinades, salad dressings, and as dip with olive oil for a crispy sourdough bread.  My vinegar selection before this included only white, cider, and red wine vinegars, but now I am interested in trying others.
          
Quinoa with chicken, spinach, corn, onions
Quinoa: The first time we tried this grain in a mixture with sauteed veggies, I was underwhelmed.  The texture was something to get used to and it seemed a bit bland.  But in trying to find a healthy alternative to white rice with it's lack of nutritional value and high glycemic rating, I was convinced to try again.  I am glad I did.  It is actually a seed, and a good source of protein.  In fact, Quinoa provides the range of amino acids to be considered a complete protein, which is unusual for a plant source.  It also is a good provider of magnesium, phosphorous, iron, and fiber.  It's quick to cook, and with better seasoning and a more exciting selection of food to surround it, as rice would require also, it has become a favorite with the family.  I usually cook it in chicken broth, and we often eat it with stir-fried veggies of all types and with our "Mexican Chicken Slop" dinners on Thursday nights...when it's seasoned much like Mexican or Spanish rice, and served with my homemade version of refried beans and chicken in enchilada sauce.  (I'll try to remember to share recipes and explain the meal name at a later date!)
            
Goat cheese (and Feta):  I bought some goat cheese at Costco, and really had no idea what to do with it.  Shortly after, I was participating in a discussion about pizza on the Gardenweb Kitchen forum and member, Jsweenc, posted a photo of pizza she'd made using goat cheese as a topping.  I asked a couple of questions, and the next time we made pizza, I crumbled goat cheese across the veggie pizza, and also on one with pesto as the sauce.  Everyone loved it.  Prince Stoic declared Pesto and Goat Cheese his new favorite pizza.  We also love it in salads, particularly a Greek-inspired salad with Romaine lettuce, sweet onions, cucumber, tomatoes, and olives.  When I couldn't get the goat cheese I'd purchased previously, we tried a mild Feta, which worked as well for both the salads and the pizza.
             
Duck:  Actually it was only a couple bites of duck breast that I tried.  Hubby went duck hunting, for the first time in his life, with a dear friend of his.  He didn't get anything himself, but tried for a couple, and the friend sent him home with the breast from one of his catches.  (Would you call a duck a catch?) He told him to marinate it in Italian dressing for 24 hours, then grill it slowly.  We were surprised at the meaty taste...something between steak and chicken, with a slight liver flavor to it.
          
Blue Agave Nectar:  This sweetener is about one and half times sweeter than sugar, so you need less to accomplish the same sweetness, and it is comparable to fructose in the glycemic index, which is much lower than white sugar.  So less of it, and a lower glycemic load are each good things, and together are really great for keeping blood sugar levels steadier.  We have used this in coffee drinks, iced and hot teas, and any recipes that call for honey or syrup, like in our granola.  I sometimes feel a sugar crash after a sweetened soy milk and coffee drink, but don't when I use only a little squirt of the agave nectar, which is all that's necessary. (I admit to adding an occasional splash of flavored syrup, but I need less of it if I use a tiny bit of agave, too.)


Previous posts you may enjoy:
Granola Recipe
(using the rolled oats)
Pizza sauces...
better late than never?
Pizza Crust Recipe


Related Posts Plugin for WordPress, Blogger...